Essential Float Fishing Rod Equipment

13 min read
There’s something almost meditative about watching a float drift along the surface, riding the gentle currents before suddenly—sometimes dramatically, sometimes barely perceptibly—it signals that magical moment of connection between angler and fish.
Float fishing is perhaps the purest form of the sport, a direct line to fishing’s ancient roots, yet still as effective and rewarding today as it ever was.
Choosing the Right Float Rod: The Heart of Your Setup
The rod is the cornerstone of any float fishing setup, and getting this choice right makes everything else fall into place. Unlike other fishing styles where a generalist rod might suffice, float fishing demands specific characteristics from your main tool.
Length Matters
For float fishing, rod length is crucial—more so than in many other styles. Here’s why:
Longer rods (12-16 feet) provide several key advantages for float work:
- Better line control when guiding floats through swims
- Increased ability to hold line off the water
- Greater reach for fishing tight to far bank features
- More cushioning effect when playing lighter-hooked fish
The old saying that “you can fish a long rod short, but you can’t fish a short rod long” rings particularly true in float fishing. I typically carry three float rods in my arsenal:
- A 13ft rod for general river and canal work
- A 15ft rod for wider rivers and windy conditions
- An 11ft lighter model for small streams and delicate presentation
One misconception I often hear is that longer rods are automatically heavier and more cumbersome. Modern carbon technology has largely eliminated this concern—my 15-footer weighs scarcely more than shorter models from just a decade ago.
Action and Test Curve
The action of a float rod is critical to both presentation and fish-playing capabilities:
Through action rods bend progressively throughout their length, making them perfect for fishing with lighter lines and smaller hooks. They provide excellent bite detection while protecting light tackle from lunging fish.
Tip action rods concentrate their bend in the upper third, providing more backbone for controlling larger fish or fishing in stronger currents.
For most float fishing situations, a rod with a medium-through action and a test curve between 1-1.75lb proves ideal. This combination offers the sensitivity needed for bite detection while providing enough power to control decent-sized fish.
I learned this lesson the hard way on the River Severn years ago, when I hooked what turned out to be a double-figure barbel on float tackle. My overly stiff rod couldn’t absorb the fish’s powerful runs, resulting in a straightened hook and a fishing story rather than a fishing photo.
Material Considerations
Modern float rods are typically constructed from carbon fiber composites, offering the perfect balance of strength, sensitivity, and weight. However, there are nuances worth considering:
High-modulus carbon creates lighter, stiffer rods with excellent feedback but sometimes at the cost of durability.
Composite blends that incorporate fiberglass or lower-modulus carbon provide more forgiving actions and often greater durability.
For beginners, I generally recommend a middle-ground option—something with enough carbon content to be responsive but with enough composite material to forgive the occasional mishap. As skills develop, the subtleties of higher-end rods become more appreciable.
Handle Design and Reel Seats
The handle of a float rod might seem secondary, but when you’re holding it for hours on end, small details make a big difference:
Cork handles remain the gold standard for float fishing, providing warmth, grip, and a pleasant tactile experience. Full cork handles typically feature on higher-end rods, while cork/EVA combinations appear on mid-range models.
Reel seats should secure your reel firmly without adding unnecessary bulk. Screw-lock fittings are ideal, preventing any movement during casting or playing fish.
One feature I particularly value in my own float rods is a slightly shortened handle below the reel seat. This provides better balance when trotting on rivers and stops the butt of the rod catching on clothing during the constant casting and feeding required for this method.
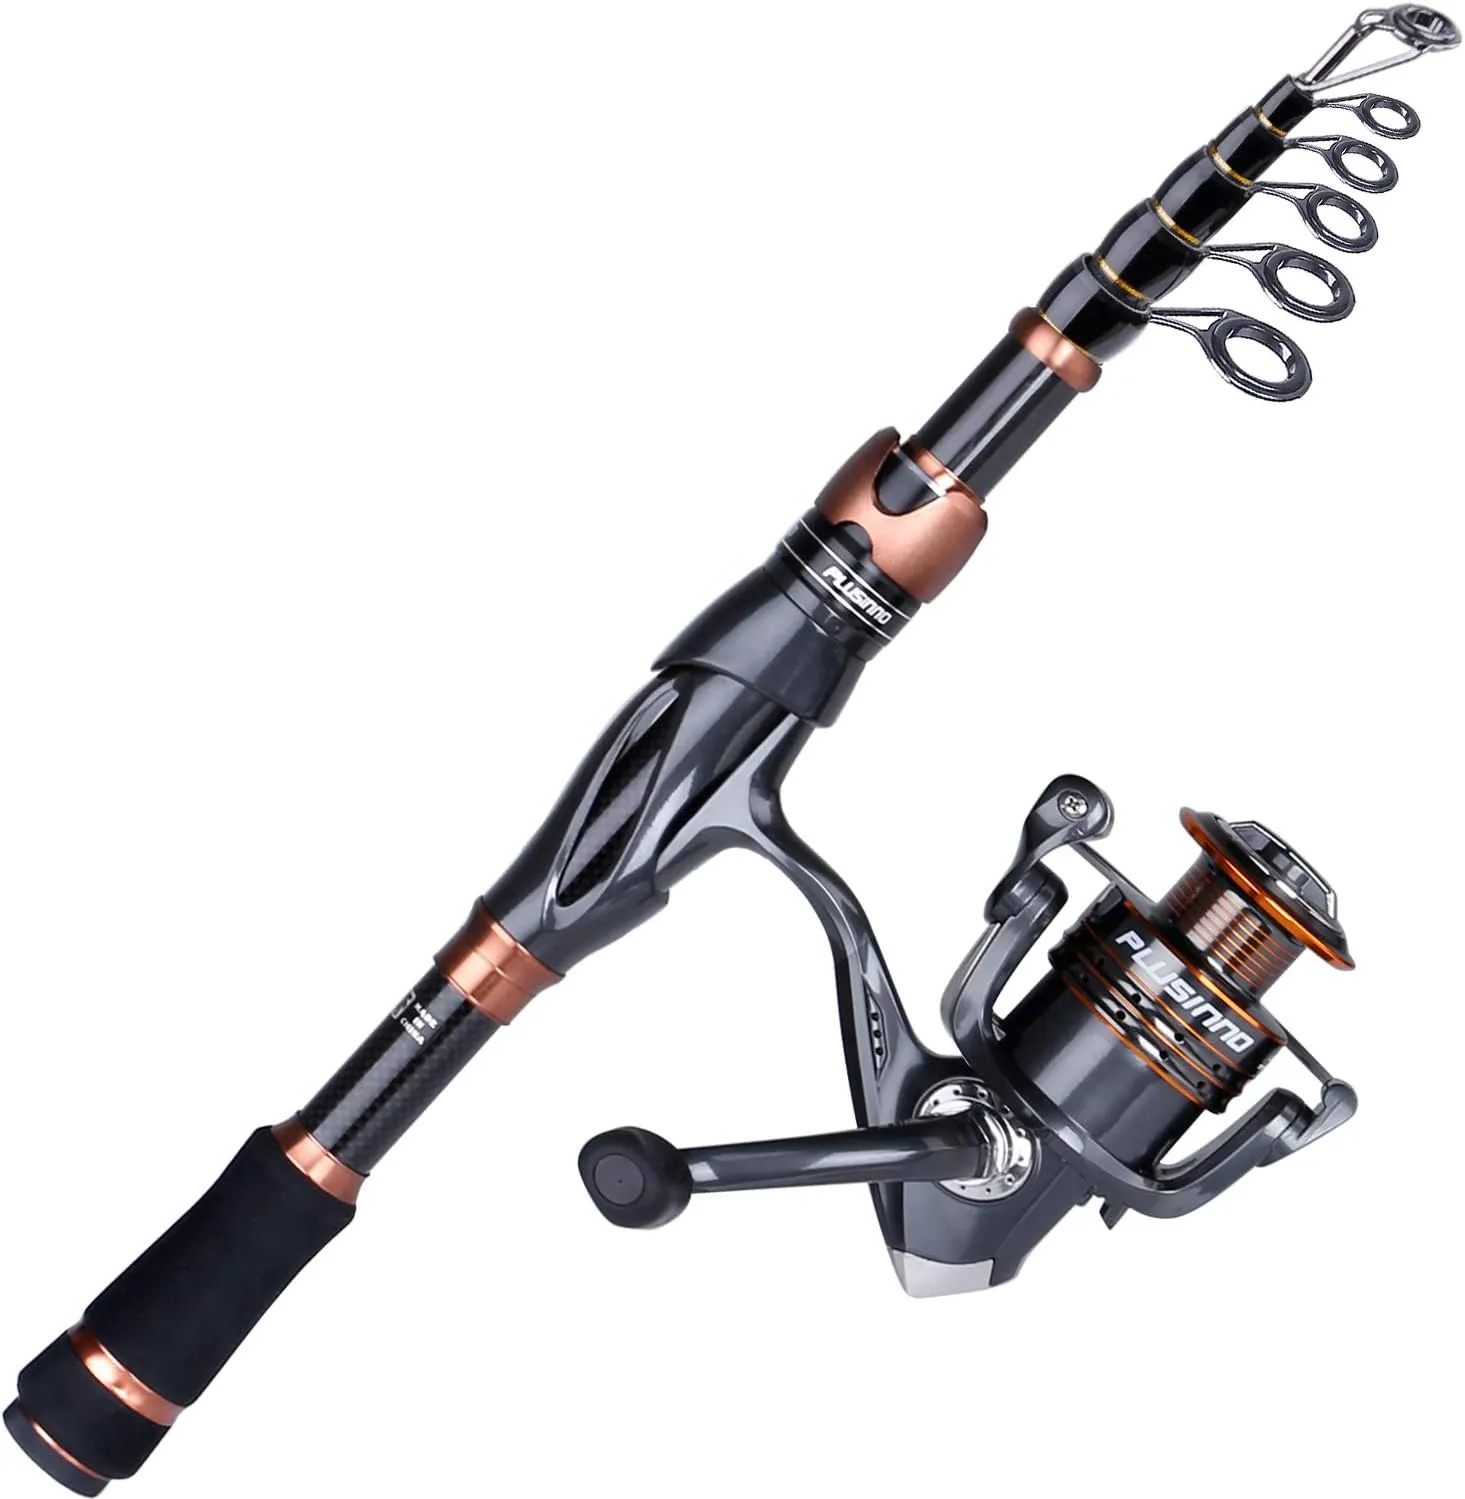
Float Reels: Balancing Smooth Delivery with Control
Paired with your carefully selected rod should be an equally appropriate reel. For float fishing, certain characteristics stand out as particularly important:
Size and Weight Balance
A properly balanced outfit feels like an extension of your arm, and achieving this harmony between rod and reel makes a day’s fishing infinitely more enjoyable:
3000-4000 size reels typically offer the ideal balance for float fishing, providing adequate line capacity without overwhelming lighter rods.
Weight distribution matters more than absolute weight—a slightly heavier reel positioned correctly can actually improve the balance of a longer rod.
I prefer reels that position their weight closer to the rod, creating a more natural pivot point just above the handle. This reduces fatigue during extended sessions and provides better control when executing repetitive casts.
Drag Systems and Gear Ratios
While float fishing rarely puts extreme demands on a reel’s drag system, smooth operation remains important:
Front drag systems typically offer better performance and finer adjustment than rear drag alternatives, making them preferable for float work.
Gear ratios around 5:1 provide a good middle ground, allowing quick line recovery when needed while maintaining sufficient mechanical advantage for playing larger fish.
The smoothness of the drag is particularly important when using lighter hooklinks—I look for systems that start without any “sticking” that might cause line breakage with sudden surges.
Spool Design
The spool design significantly impacts line delivery—crucial for successful float fishing:
Shallow spools reduce line coiling and memory, allowing line to flow more freely during casting and presentation.
Spool edge taper affects how line leaves the spool—a subtle but important factor in achieving consistent distance and accuracy.
I’ve found that spools with a slight taper at the lip provide the best line flow, especially when using lighter monofilaments that are prone to memory issues.
Mainlines and Hooklinks: The Critical Connection
Line choice can make or break your float fishing success, with different scenarios calling for specialized approaches:
Mainline Selection
For float fishing, monofilament generally reigns supreme thanks to its floating properties and stretch:
Line diameters between 0.14-0.20mm (3-5lb breaking strain) cover most float fishing scenarios.
Low visibility is essential, as float-caught fish often have time to inspect your offering.
Some stretch provides valuable shock absorption when striking and playing fish.
One often-overlooked quality in mainline is its suppleness. I prefer lines that remain relatively limp even in cold conditions, as they sit better on the water’s surface and allow for more natural float presentation.
Hooklink Considerations
Whether you fish with a straight-through approach or utilize a hooklink setup depends largely on the situation:
Stepping down 2-3 diameters from your mainline creates an effective safety buffer for hooklinks.
Fluorocarbon hooklinks offer near invisibility underwater but sink faster than mono—sometimes an advantage, sometimes not.
For most of my float fishing, I use a simple blood knot to attach a hooklink that’s around 30% lighter than my mainline. The slight visibility gain is outweighed by the confidence of knowing I’ll lose just my hook rather than a fish with a meter of line trailing from its mouth if the worst happens.
Float Selection: More Than Just Bite Indicators
Floats are not simply bite indicators—they’re sophisticated tools that control bait presentation and help manage the relationship between your bait and the water’s movement:
Match Your Float to the Conditions
Different fishing scenarios demand specific float designs:
Stick floats excel in flowing water, their slender profile cutting through current while providing excellent stability.
Waggler floats shine in still water and when distance casting is required, with their weight concentrated at the bottom.
Avon floats bridge the gap between the two, handling moderate flow while providing good stability.
I carry a selection of each type in various sizes, though I find myself reaching for slightly heavier patterns than many anglers. The additional stability allows for more positive presentation, particularly in inconsistent conditions.
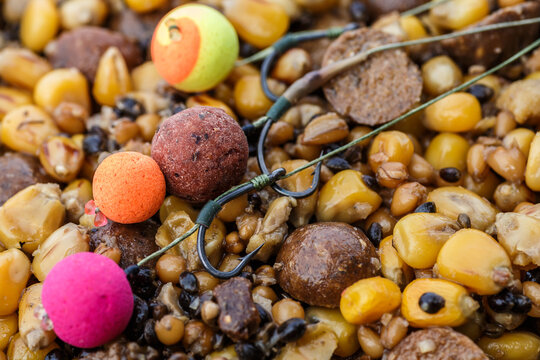
Shot Capacity and Visibility
The shot-carrying capacity of your float directly affects presentation and bite registration:
4×16 to 6×18 sizes cover most general float fishing situations.
Highly visible tips in fluorescent orange, yellow, or red make bite detection easier at distance.
For clarity, the traditional ”×” numbering system refers to how many No.4 shot the float can support before submerging. Thus, a 4×16 float requires sixteen No.4 shot to sink it to the bristle tip.
One approach I’ve found particularly effective is using slightly oversized floats with added shot locking them in position on the line. This creates a more stable presentation even in challenging conditions like gusting winds or variable currents.
Shotting Patterns: The Art of Presentation
How you distribute weight along your line fundamentally affects bait presentation and bite registration:
Classic Patterns with Modern Twists
While traditional shotting patterns remain effective, subtle refinements can improve their performance:
Bulk and droppers concentrate most weight 18-24 inches from the hook, with smaller “dropper” shots leading down to the bait.
Shirt button patterns distribute shot more evenly, allowing for a more controlled fall of the bait.
I’ve found that hybridizing these approaches often produces the best results—using a modified bulk and dropper pattern but with the bulk split into several shots rather than one or two larger ones. This provides control while maintaining sensitivity.
Non-Toxic Alternatives
With lead shot restrictions increasing globally, alternatives have become necessary:
Tungsten putty provides a non-toxic option that can be molded to exact requirements.
Non-lead shot in materials like tungsten or tin perform similarly to traditional lead.
While these alternatives initially seemed like a compromise, I’ve come to appreciate the advantages of tungsten in particular—its greater density allows for smaller shot achieving the same weight, reducing line drag in the water.
Hooks: The Business End
Hook selection for float fishing requires balancing strength against finesse:
Patterns for Purpose
Different species and baits call for specialized hook patterns:
Fine wire hooks in sizes 18-22 excel for maggot and caster presentations targeting roach and dace.
Medium wire hooks in sizes 12-16 handle corn, bread, and worm baits for species like bream and chub.
Strong wire hooks become necessary when larger specimens like tench or carp might appear.
Rather than carrying dozens of different patterns, I’ve simplified to three main types—a fine wire pattern for small baits, a medium all-rounder, and a stronger pattern for when targeting or expecting larger fish.
Barbless vs. Micro-barbed
The debate between barbless and barbed hooks continues, though regulations increasingly settle the matter:
Barbless hooks cause less damage to fish and allow for easier unhooking.
Micro-barbed patterns provide additional security without the fish welfare concerns of full barbs.
Where allowed, I prefer micro-barbed hooks for most float fishing applications. They strike a good balance between fish welfare and hook security, particularly when using softer baits like bread or corn that might mask a proper hook set.
Storage and Transport: Protecting Your Investment
Proper storage of float fishing tackle extends its life and ensures everything is ready when you need it:
Rod Storage Solutions
Protecting longer, more delicate float rods requires appropriate storage:
Three-section rod sleeves with dividers prevent sections rubbing against each other.
Hard tubes offer maximum protection for transport but require more space.
I’ve found that individual rod sleeves combined with a multi-rod holdall provides the best balance of protection and practicality. The sleeves prevent damage during storage, while the holdall makes transportation manageable.
Float Storage Systems
Floats represent a significant investment and need protection from damage:
Compartmented cases with foam linings prevent damage to delicate bristles and bodies.
Tube systems work well for stick floats but less so for waggler patterns.
My own solution combines both approaches—tubes for my stick floats and a compartmented case for wagglers and specialty patterns. Whichever system you choose, ensure floats are completely dry before storage to prevent discoloration or damage.
Beyond the Basics: Finishing Touches
While the core components we’ve discussed form the foundation of any float fishing setup, several accessories can enhance your fishing experience:
Landing Nets
A proper landing net completes your float fishing setup:
Longer handles (2-3 meters) provide reach when fishing from high banks or using longer rods.
Soft mesh materials cause less damage to fish scales and fins.
I prefer a medium-sized net head—large enough for any likely catch but not so unwieldy that it becomes difficult to handle, particularly in windy conditions.
Pole Rollers and Rod Rests
Support systems keep your rod positioned correctly during fishing:
Adjustable rod rests with protective material prevent damage to blank or guides.
Bank sticks with stable designs prevent movement during bites.
For rivers and sloping banks, I use a tripod front rest that provides stability regardless of the ground conditions—a small investment that has saved many a rod from an unexpected swim.
Bait Management
Keeping bait fresh and accessible improves both efficiency and results:
Bait waistcoats or aprons keep everything within easy reach during active methods like trotting.
Bait cups with secure lids prevent spillage while allowing quick access.
I’ve found that pre-measuring groundbait into individual bags before a session saves valuable fishing time and ensures consistency in feed amounts throughout the day.
Putting It All Together: Creating Your Perfect Float Fishing System
The beauty of float fishing lies in its versatility and the way each component interacts with the others. As you develop your own system, consider these guiding principles:
Balance Throughout the System
Every element should complement the others:
Rod length and power should match your typical venues and target species.
Reel size and weight should balance your chosen rod.
Line diameter should suit both your quarry and the conditions.
Rather than assembling a collection of individually excellent pieces, focus on how they work together. I’ve seen anglers with modest but perfectly balanced equipment consistently outfish those with expensive mismatched setups.
Versatility with Limitations
While it’s tempting to create a setup that can handle everything, some specialization improves performance:
Having two complementary setups often proves more effective than one do-it-all outfit.
Accept the limitations of your equipment rather than pushing it beyond its design parameters.
My own approach centers on a 13ft medium-action rod paired with a 3000-size reel as my all-rounder, supplemented with lighter and heavier specialized outfits for specific situations. This provides versatility without excessive compromise.
Quality Where It Matters Most
Strategic investment in key components yields the greatest returns:
Rod quality impacts everything from casting accuracy to bite detection.
Reel smoothness affects line delivery and fish playing capability.
Float quality directly influences presentation and bite registration.
If working with a limited budget, I’d recommend investing proportionally more in your rod, followed by floats, then reel. A quality rod paired with a mid-range reel will outperform a mid-range rod with a premium reel in most float fishing scenarios.
Final Thoughts: The Ongoing Evolution of Your Float Fishing Equipment
The equipment we’ve discussed forms the foundation of a capable float fishing setup, but your journey doesn’t end here. As your skills develop and your fishing situations diversify, your equipment needs will evolve alongside them.
Don’t be afraid to experiment with different components and combinations—some of my most effective setups have resulted from unconventional pairings born of necessity or curiosity. Take notes after fishing sessions about what worked and what didn’t, allowing your equipment choices to be guided by actual experience rather than marketing claims.
While quality equipment enhances the fishing experience, knowledge and watercraft remain your most valuable assets. The most sophisticated float fishing outfit available won’t compensate for poor location choice or presentation. Conversely, a skilled angler can achieve remarkable results with modest equipment applied with understanding and precision.
Whether you’re just starting your float fishing journey or looking to refine an established setup, I hope these insights prove useful in your pursuit of that most satisfying moment—when your carefully selected float dips, slides, or vanishes, signaling the beginning of another angling memory.
Tight lines, and may your float always dip when you least expect it!